Enrollment
Enrollment Process Initiated from Client
This section provides details regarding Enrollment Process Initiated from Client.
Base URL
www.awareid.aware-apis.com
To perform a successful enroll using the Face SDK and AwareID there are two possible work flows. The first workflow is the most flexible and involves initiating the enrollment from the client. The second workflow option involves the use of a secondary application to initiate the enrollment and generate a QR code encoded with the session token necessary to proceed with the enrollment. The QR code is scanned from the client application and then proceeds with enrollment using the data encoded in the QR code.
To enroll by initiating from the client we have to follow 5 steps. These steps include:
- Retrieve an access token. This token allows communication between the client application and the AwareID servers.
- Get Public Key - Public Key for face data encryption
- Initiate an enrollment.
- Add device
- Enroll face
Enrollment Initiated from Client Step 1 - Get Access Token
Our first step is to retrieve an “access_token”. This token will be used in our next api call to retrieve an enrollment token to proceed with enrollment.
Get Access Token
   POST /auth/realms/{{customer_name}}-consumers/protocol/openid-connect/token
   Content-Type: 'application/x-www-form-urlencoded',

   "client_id": client_id
   "client_secret": client_secret
   "scope": openid
   "grant_type" : client_credentials
Urlencoded
This is the only call whose content type of this call is “application/x-www-form-urlencoded”
Response - openid-connect
Response - openid-connect
   STATUS CODE 200
   {
       "access_token": "eyJhbGciOiJSUzI1NiIsInR5cCIgOiAiSldUIiwia2lkIiA6ICJCY2IxNXZJQkZsY2JYazVmQUdJZFZXV2pTUEtTaWpsazNydmFwMHp0ekN3In0.eyJleHAiOjE2NzM5OTExMjksImlhdCI6MTY3Mzk5MDgyOSwianRpIjoiN2MzYmY1MmItNjdlMC00ODNlLWFhZjAtYjlkNWJhODE3ZWJiIiwiaXNzIjoiaHR0cHM6Ly9hd2FyZWlkLWRldi5hd2FyZS1hcGlzLmNvbS9hdXRoL3JlYWxtcy9hbmRyYWUtY29uc3VtZXJzIiwic3ViIjoiOTU3ZWMyYmYtZTczOS00YjFjLWEyN2QtMTczMjQzMDIyYTE5IiwidHlwIjoiQmVhcmVyIiwiYXpwIjoiYmltYWFzLWIyYyIsImFjciI6IjEiLCJzY29wZSI6Im9wZW5pZCIsImNsaWVudElkIjoiYmltYWFzLWIyYyIsImNsaWVudEhvc3QiOiIzOC4xNDAuNTkuMjI2IiwiY2xpZW50QWRkcmVzcyI6IjM4LjE0MC41OS4yMjYifQ.OzggQ--Gl4w3NWZPg1BukkEg0fmsSyGgN-ag8eW0FARWl0Ic5fkrnrEdnIgsq5Molq0R52oe4Hy-8Tp4cOn9iCD51kPCPfTt15zVBIAYOvb5M5XZ0uPTygh02KjuFqsxIhbhH8CCUjHkpu3OhoWByc8bC8c9D_cFp3BFE-XIhNPaPxXdTLZOcJOqpdSVxsgxB66-xukI7AA8PWt10huO47l6TSBSnJIjUxNbEqR48ILfnkYY2bmyfoo-laKDv9XSSZ8hXU9sDkiGfpXOl112_f3L1sc6n1-UbRTJGFMd4fgntuanwEvN68TsyS5pz0izGlW-1T3fFJ3D2pGPefsWNA",
       "expires_in": 300,
       "refresh_expires_in": 0,
       "token_type": "Bearer",
       "id_token": "eyJhbGciOiJSUzI1NiIsInR5cCIgOiAiSldUIiwia2lkIiA6ICJCY2IxNXZJQkZsY2JYazVmQUdJZFZXV2pTUEtTaWpsazNydmFwMHp0ekN3In0.eyJleHAiOjE2NzM5OTExMjksImlhdCI6MTY3Mzk5MDgyOSwiYXV0aF90aW1lIjowLCJqdGkiOiJkYWNiNTc1NS1jMGEyLTQxZTEtYjMwMi05ZGEzOWRiNGNiYmUiLCJpc3MiOiJodHRwczovL2F3YXJlaWQtZGV2LmF3YXJlLWFwaXMuY29tL2F1dGgvcmVhbG1zL2FuZHJhZS1jb25zdW1lcnMiLCJhdWQiOiJiaW1hYXMtYjJjIiwic3ViIjoiOTU3ZWMyYmYtZTczOS00YjFjLWEyN2QtMTczMjQzMDIyYTE5IiwidHlwIjoiSUQiLCJhenAiOiJiaW1hYXMtYjJjIiwiYXRfaGFzaCI6IlcwbXNUU05WQUo1MG9oQ2JOR3dlTmciLCJhY3IiOiIxIiwiY2xpZW50SWQiOiJiaW1hYXMtYjJjIiwiY2xpZW50SG9zdCI6IjM4LjE0MC41OS4yMjYiLCJjbGllbnRBZGRyZXNzIjoiMzguMTQwLjU5LjIyNiJ9.MOgJ3giF0ikQnUAOBgK6eHpC0Tz3pCjhTX4IjHSjh3kzxx0KCLiWd494Fl3JSHiyvnNP7Ty1SXl4Bhq19f7y_lpGp4yLkbV9I1xsfC7m2D-EIf73D1LEluf1y97ISbh8668VqnGRG8U1FtXuwQGPZb7cgMiTbprECwLFj44_vM2qmLxFpOkOuVaqPmpgjt6MAmUbcWV8GDMAdxVnlZDZuzFkwOlb6S_WypNSYKHA6TFIe_FsA2EoxMu_9MAP3OLX7LIwX3jYIsT4z-TnUmyKC5RFzx6oc9D9Fr2eSTRBxC6QKGJrFAPt40p9_U3YFFi6VpzaGK9YQvCvdw70CVBe5Q",
       "not-before-policy": 0,
       "scope": "openid"
   }
Enrollment Initiated from Client Step 2 - Get Public Key - Public Key for face data encryption
For security purposes the face data associated with the is encrypted for transmission to the AwareID servers. This encryption is done using a public key given by the server. To retrieve that public key the below call is made:
Get Public Key
   GET /getPublicKey
   "Authorization":"Bearer accessToken"
   "apikey": apiKey
Response - Get Public Key
   STATUS CODE 200

   -----BEGIN PUBLIC KEY-----
    //Public key example
     -----END PUBLIC KEY-----
Enrollment Initiated from Client Step 3 - Initiate An Enrollment
With the method type we start onboarding with accessToken, sessionToken, apikey
Initiate An Enrollment
   POST /onboarding/enrollment/enroll
   Authorization: 'Bearer AccessToken'
   apikey: 'apikey'

   {
       "username":  "username",
       "firstName": "first name", //optional
       "lastName": "last name" //optional
       "email": "user email",
       "phoneNumber": "user phonenumber"
   }
Response - Initiate An Enrollment
Response - Initiate An Enrollment
   STATUS CODE 200
   {
       "enrollmentToken": "enrollmentToken",
       "userExistsAlready": false,
       "requiredChecks": [
           "addDevice",
           "addFace"
       ]
   }
Enrollment Initiated from Client Step 4 - Add Device
The device ID is checked when performing an authentication to confirm the device enrolled is the same as the device attempting.
Device Id
   This can be retrieved in Android by using the following code
   Settings.Secure.getString(getContentResolver(), Settings.Secure.ANDROID_ID);
Add Device
   POST /onboarding/enrollment/adddevice
   Authorization: 'Bearer AccessToken'
   apikey: 'apikey'

   {
       "enrollmentToken": "enrollmentToken",
       "deviceId": "deviceID"
   }
Response - Add Device
Response - Add Device
   {
       "enrollmentStatus": 1,
       "registrationCode": ""
   }
From here the response will include a registration code and enrollment status.
There are 3 enrollment statuses:
Enrollment Statuses
   0 = Enrollment Failed
   1 = Enrollment Pending
   2 = Enrollment Complete
Enrollment Initiated from Client Step 5 - Add face sample and check if sample belongs to a live person.
The add face API call requires the json package generated by the Face SDK.
Add Face Sample
   POST /onboarding/enrollment/addFace
   Authorization: 'Bearer AccessToken'
   apikey: 'apikey'

   {
       "enrollmentToken": "enrollmentToken",
       "faceLivenessData":
          {
            "video": {
            "workflow_data": {
               "workflow": "hotel2",
               "rotation": 0,
               "frames": [
                   "data":"face package data generated by face sdk",
                   "data":"face package data generated by face sdk",
                   "data":"face package data generated by face sdk"
               ]
           },
           "meta_data": {
               "client_device_brand": "Unknown",
               "username": "username",
               "client_version": "Mozilla/5.0 (Windows NT 10.0; Win64; x64) AppleWebKit/537.36 (KHTML, like Gecko) Chrome/87.0.4280.88 Safari/537.36 Edg/87.0.664.66"
           },
           "client_version": "Mozilla/5.0 (Windows NT 10.0; Win64; x64) AppleWebKit/537.36 (KHTML, like Gecko) Chrome/87.0.4280.88 Safari/537.36 Edg/87.0.664.66"
       }
     }
   }
Response - Add Face Sample
The response from the enrollment call returns:
- Liveness Result
- This is a boolean value.
- returns true if the sample is assessed to be a live sample
- returns false is the sample is assessed to not be live
- Enrollment Status
- 0 = failed
- 1 = pending
- 2 = success
- Registration Code
- this code is used in the re-enrollment process
- Liveness Result
- Broken down into several fields giving feedback on the liveness score
Liveness Result
  STATUS CODE 200
  {
      "livenessResult": true,
      "enrollmentStatus": 2,
      "registrationCode": "LLXL2N",
      "livenessResults": {
          "video": {
              "liveness_result": {
                  "decision": "LIVE",
                  "feedback": [],
                  "score_frr": 1.1757098732441127
              }
          }
      }
  }
Enrollment Process Initiated Through QR Code
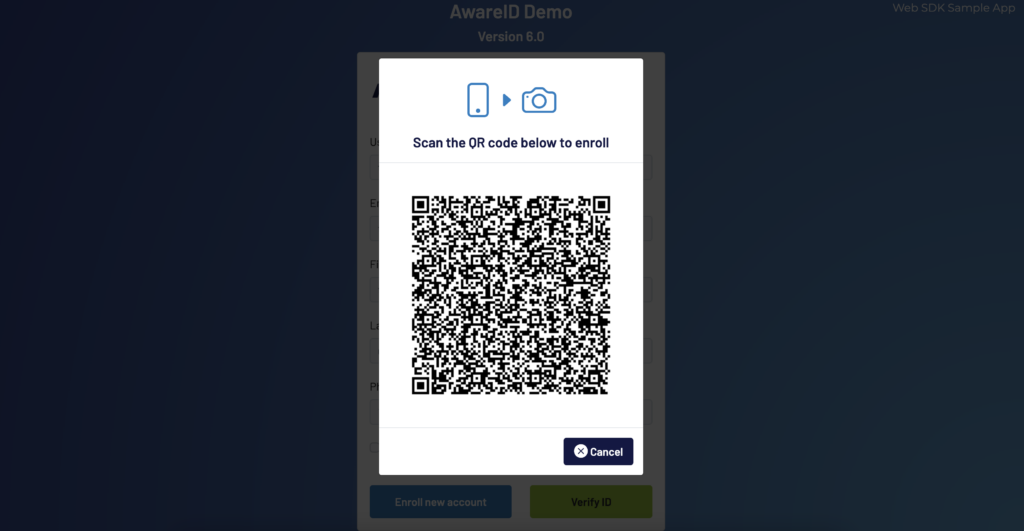
To enroll by inititating through a QR code scan we first have to take in the enrollment details like first name, last name, email address and phone number and make a call to generate the QR code from a secondary application. In our demo we use a web app for this process.
Generate QR Code
Web Portal

To start an enrollment using the QR code method we must first generate the QR code to be consumed by the client application (in our example we use a web app). This web application uses a UI to allow an enduser to register using a username and email address. Then uses these pieces of information in the API Call for /triggerEnroll.
Base URL
www.awareid.aware-apis.com
Trigger Enroll
We initiate an enrollment by calling the /triggerEnroll endpoint with our received access token
- username - required
- email - required
- notifyOptions - optional
Trigger Enroll
   POST baseUrl + /b2c/proxy/triggerEnroll
   Content-Type: 'application/json; charset=UTF-8',

   { "username": "[email protected]",
       "email": "[email protected]",
       "notifyOptions": {
           "notifyByEmail": false
       }
   }
Response - Trigger Enroll
   STATUS CODE 200
   {
       status : "SUCCESS"
       sessionCallbackURL : "https://awareid-dev.aware-apis.com/onboarding?data=jgTW40dmoG6Hp_d6Rg7YaZ97vfGSlV5BcBJvLvqXVmhoQ2Hg2DcC2Kvr9AkTZ38ZkyIfiSj80QFxOWs1YeckYsp3D0D9vS46wppl1Zdt-tpiAdzlvBKA2DBfcj7rf0VePWUn1vKdIPgEoWAulqRxZ_mNakFB7FijLg0QJ8kYsB6w0Nk1A4m9QtLGIdHcuGn9XJnxooQHyr2yhtUsgfOo2FrRXYmFIF7ZNwxYd56miFCs-yuD6eZZcvZ1M01Wje7ji0NYUWVpdes-DA_P0cKgsLPX5sV7SyPSlf9kmoCQz7Ag20kAKkOf-LFFKQmgnJ3362nXIEovxS8vp4BCClu7vIfEVCE2s1zS7zNwrDuRfFdViVAQMMxDMe77LnbKbfvLqUhiv--wPFyV9Iier1EDSL9y5kikOw_PGSyuRzvbQKuoNdGj-IqVZYZ_5QivOFqq_OEt8jaX1zZxAiQ8uXRt3g"
       qrcodeImage : "iVBORw0KGgoAAAANSUhEUgAAAZAAAAGQAQAAAACoxAthAAAGgklEQVR42u2ca4okOQyEDb6WwVc36FoGr+ILZ9NZO7Dsj2VtqB7orsrKKPArFAopp6x//VO+kC/kC/lCvpAv5Av5TyCzlNJnH62u2SNG6yvyVX6Sl0bjsm+6AJIX8npe7ZE3r8gXK6F9VL3Mr8n783vmDZCmC+u5a9QVo5Q6av7O6dCUzNb2TRdA8u3IQY8cas0VbDlojVzX9cG4CaJ95/ty4HlTy99TG3FUrWD8zNHpELZlnjH97Tn8XL0hXGcqqpY45h928omQHHL7x5+/McyREH400tyGYgctX8udqOGbMYbvXudDRGylRkKSH7Qtpw5c39vSZyuhERdAtClzsFUHzDfnpwpQOQ35VVOzom17AySv5P1FxygUUrvpW4zX4XPF3ipOPB+i0YrAQ9c7E5HT0YlDXkHofPyivmMheQMiIbm6+BZ9hY7cgO+CtS513gDRkuXeU2jN9ZIEym3JJDjo7snp63xIDldSJ4hLU8vJ+4xMmgztxgy32pgXQNBoCqqKO5uyQ2vpYKt5CVP7BZDKyCukoDGLvwffkfB87+zhNfxTIYvX3prSb1o2Dl2yuoUbarvVGyBKdgYxJ+dgo8R7HYqvlnbaqhdAvOG8WKG/UIcUtcQooUlf+pv5j4UgFnSMFFa1qkoVYs/Jzg9GKVdAEJz6hHkIohB5gdJRWQRBdBoXQCbiJiDrHUvRCYXY9HBFrBeNHwqx8MmRwnadwJoLmbwnqwBXpygu9Rsg+qTVvaDcKLkzGrtTGQKKtf9e/VMhJG0kPdgESnRimSRQ2Q67s88bIHWSOFfGzN8aayvrhZ+mtLv8ziyOhXhwRfQnqhNhB/qUuKQdSmrXb4BgZbCMOILDHhRJdsW8tdnxXv0zIUoJQpaglq0KSsaGOSiigMFHq1dAhFEaSlSqj0cg/YY0NXnUl91xLEScNm0SYN3s99XpqI5XtZ97PgTnRltS9IBOGDi1yOvRt59rUXc6ZNkWgPds4izyOaXV4j1kD07u+RDWr9s9G1BGs2iY+DVkCfg5N0A4UjsMicPF2+g5CMPhtY5yA4QiIP/w0UyDaDo7OtuRem/LQyFyaIbtJ0lRqwKN/ImoyndEhBdAyBMaJjPOxiC3FvdJ1HUoEc2wLoAEZQGJHukd3LNpce3kh5Rovko2B0MYqZZQqgH7dtQ9K6hrMciHnX4ohNRteC9WzGfVN2yDSDfYWmtXQMQRBJxJwjasPJ2+UU1zx0PcAJGCI7BWCmfiCZ8vveASgbZeALFJw9rpmElnUyeEN6oz6vqWo8dCsJwG5Wfqm5Rpm7dlUIdyNveqWB0L0ZmqHDSUT8TjGljWyQBpH8M/FELwkfZ0QCo2PnClFulbNY3XCyDk1U0OVOHD5Son5pQyOmaDLzofgsLBUqPVROy3XTWXnC0jPuyOUyF17NO1iY7Os8CRGs2OzofsORhCprkpgdSnWAPtuvNjU/XzIShni9GwUCNp++kSqpsZ+7oAglIY5DxUO5EJ9ekKEvWFCx0XQBRN6fwThY9d5FzhSfBm7bEugRBFN5haLcna8AZ1Z217l9JOhZCiifpg6uEyusuC5J8D1/Dd3XEqhJasSc+sKxs0AcvtoFnTDDLeztWxEDKCnVZTbhoUcNyHojf0a7UrIBFuMGueAla1EaGQccUL+dHZdShktMfUeEIrGpU2mt1G67aUCyC7BCWCQ65Vmwbbx227iWOUGyB2biaKFNtz9/6Q1E3rnYccD4dM5wfTq4iBC6zY6Vxu1yjvtPpQyB6bqhr8fbqbGs4B1bSn2fF8yCTntOdB2jYwA5FtaFQqn7/b5o+FoKG9jLRn6qO5S2jByOWvv1rOzoXQuYSXyWGi6TR4eIYsruzU+v1oxqEQBRwCD0n1CofSsHmwN2282ufOhTSiZ8GypUFLXu3urNk1gpj9N40fCyG3EWMPn7MqU8rPMvipoHgI8gKIVQHKE6vWCmhi57g9c1oRXQAZPl1UzG2o+7GZgjtFsPp5ivF0yH76h+fM+l476gMkbc2tW/PzUaYjIXMXMM3XcLrO2DCNuz/7p8J5OqS7sKlsYbo7q6MbKKDblf5DmeNMSMOe5WCR7CgxYMDUnx576qPl7GRIoW1GeVxzY7Yrt8VZT3meZrgEMvw8FmYhxqcfNCVguXvrAshu8e8PBXITzzPZfn5agm6AiC6oyrrdLObz3CK19e6H/+qKCyDf/73hC/lCvpAv5Av5Qv5nyF+w76Y2yWY7wwAAAABJRU5ErkJggg=="
       sessionToken : "aa73e547-0f1b-4235-a7b0-dd52fa4ab774"
       errorSummary : null
   }
Our response for trigger enroll includes five pieces of information with the most relevant piece being the base64 encoded string of the QR that is used to be displayed to the user to continue the enrollment on their device.

With our QR code generated in our web application we then have to proceed with scanning the QR code and completing the enrollment. The following steps apply to enrolling a user from the client side application using a QR code. These steps include:
- Scan QR code and decrypt data.
- Get Public Key - Public Key for face data encryption
- Initiate an enrollment.
- Add device
- Enroll face
The QR Code will return a url with an encrypted data parameter named “data”.
This data has to be decrypted using the available public key. Once decoded 3 pieces of information are provided separated by “&”.
- Host url
- This URL is where all subsequent api calls will be made through
- The API Key
- This API Key is used in the header of api calls
- The key value pair in the header is as follows:
“apikey”:API_Key
- Session Token
- The session token is used to validate the session.
Enrollment Using QR Code Step 1 - Validate Session Token
The first api call necessary to enroll a user is /tokenVerify/validateSession.
Validate Session
   POST /tokenVerify/validateSession
   "Content-Type": 'application/json; charset=UTF-8',
   "apikey": apiKey

   {
       "sessionToken":sessionToken
   }
Urlencoded
This is the only call whose content type of this call is “application/x-www-form-urlencoded”
Response - Validate Session Token
Response - Validate Session Token
   {
       "accessToken": "accessToken",
       "methodType": "enroll",
       "customerName": "customerName",
       "customerLogo": "",
       "userName": "customerUsername",
       "email": "customerEmail"
   }
Enrollment Using QR Code Step 2 - Get Public Key - Public Key for face data encryption
For security purposes the face data associated with the is encrypted for transmission to the AwareID servers. This encryption is done using a public key given by the server. To retrieve that public key the below call is made:
Get Public Key
   GET /getPublicKey
   "Authorization":"Bearer accessToken"
   "apikey": apiKey
Response - Get Public Key
   STATUS CODE 200

   -----BEGIN PUBLIC KEY-----
    //Public key example
     -----END PUBLIC KEY-----
Enrollment Using QR Code Step 3 - Initiate An Enrollment
With the method type we start onboarding with accessToken, sessionToken, apikey
Initiate An Enrollment
   POST /onboarding/enrollment/enroll
   Authorization: 'Bearer AccessToken'
   apikey: 'apikey'

   {
       "username":  "username",
       "firstName": "first name", //optional
       "lastName": "last name" //optional
       "email": "user email",
       "phoneNumber": "user phonenumber"
   }
Response - Initiate An Enrollment
Response - Initiate An Enrollment
   STATUS CODE 200
   {
       "enrollmentToken": "enrollmentToken",
       "userExistsAlready": false,
       "requiredChecks": [
           "addDevice",
           "addFace"
       ]
   }
Enrollment Using QR Code Step 4 - Add Device
The device ID is checked when performing an authentication to confirm the device enrolled is the same as the device attempting.
Device Id
   This can be retrieved in Android by using the following code
   Settings.Secure.getString(getContentResolver(), Settings.Secure.ANDROID_ID);
Add Device
   POST /onboarding/enrollment/adddevice
   Authorization: 'Bearer AccessToken'
   apikey: 'apikey'

   {
       "enrollmentToken": "enrollmentToken",
       "deviceId": "deviceID"
   }
Response - Add Device
Response - Add device
   {
       "enrollmentStatus": 1,
       "registrationCode": ""
   }
From here the response will include a registration code and enrollment status.
There are 3 enrollment statuses:
Enrollment Statuses
   0 = Enrollment Failed
   1 = Enrollment Pending
   2 = Enrollment Complete
Enrollment Using QR Code Step 5 - Add face sample and check if sample belongs to a live person.
The add face API call requires the json package generated by the Face SDK.
Add Face Sample
   POST /onboarding/enrollment/addFace
   Authorization: 'Bearer AccessToken'
   apikey: 'apikey'

   {
       "enrollmentToken": "enrollmentToken",
       "faceLivenessData":
          {
            "video": {
            "workflow_data": {
               "workflow": "hotel2",
               "rotation": 0,
               "frames": [
                   "data":"face package data generated by face sdk",
                   "data":"face package data generated by face sdk",
                   "data":"face package data generated by face sdk"
               ]
           },
           "meta_data": {
               "client_device_brand": "Unknown",
               "username": "username",
               "client_version": "Mozilla/5.0 (Windows NT 10.0; Win64; x64) AppleWebKit/537.36 (KHTML, like Gecko) Chrome/87.0.4280.88 Safari/537.36 Edg/87.0.664.66"
           },
           "client_version": "Mozilla/5.0 (Windows NT 10.0; Win64; x64) AppleWebKit/537.36 (KHTML, like Gecko) Chrome/87.0.4280.88 Safari/537.36 Edg/87.0.664.66"
       }
     }
   }
Response - Add Face Sample
The response from the enrollment call returns:
- Liveness Result
- This is a boolean value.
- returns true if the sample is assessed to be a live sample
- returns false is the sample is assessed to not be live
- Enrollment Status
- 0 = failed
- 1 = pending
- 2 = success
- Registration Code
- this code is used in the re-enrollment process
- Liveness Result
- Broken down into several fields giving feedback on the liveness score
Liveness Result
  STATUS CODE 200
  {
      "livenessResult": true,
      "enrollmentStatus": 2,
      "registrationCode": "LLXL2N",
      "livenessResults": {
          "video": {
              "liveness_result": {
                  "decision": "LIVE",
                  "feedback": [],
                  "score_frr": 1.1757098732441127
              }
          }
      }
  }
Authentication Workflow
Like the enrollment process we can also complete an authentication in two variations. The first is initiating the authentication from the client side and the second involves using a QR code scan to initiate the authencation process and using the client application to complete it. Below we explain how to achieve both options beginning with the Client Initiated Authentication
Client Initiated Authentication
A client initiated authentication is performed in 3 steps:
- Initiate authentication
- Verify device
- Verify face
Base URL
Base URL
www.awareid.aware-apis.com
Authentication Initiated from Client Step 1 - Initiate Authentication
Initiate Authentication
   POST /onboarding/authentication/authenticate
   Authorization: 'Bearer AccessToken'
   apikey: 'apikey'

   {
       "registrationCode": "registrationToken",
       "deviceId": "deviceID"
   }
Response - Initiate Authentication
Response - Initiate Authentication
   STATUS CODE 200
   {
       "authToken": "b8bf6f22-6f93-4bcb-a5b6-871b689c6750",
       "requiredChecks": [
           "verifyDevice",
           "verifyFace"
       ]
   }
Authentication Initiated from Client Step 2 - Verify Device
Verify Device
   POST /onboarding/authentication/verifyDevice
   Authorization: 'Bearer AccessToken'
   apikey: 'apikey'

   {
       "authToken": "authToken",
       "signature": "signature",
       "deviceId": "deviceID"
   }
Response - Verify Device
   STATUS CODE 200
   {
       "message": "Device verified.",
       "authStatus": 1
   }
Authentication Initiated from Client Step 3 - Verify Face
Verify Face
   POST /onboarding/authentication/verifyFace
   {
       "authToken": "{{atoken}}",
       "faceLivenessData":
          {
            "video": {
           "workflow_data": {
               "workflow": "hotel2",
               "rotation": 0,
               "frames": [
                   {
                       "data": "",
                       "data": "",
                       "data": "",
                       "tags": [],
                       "timestamp": 1609002526076.1338
                   }
               ]
           },
           "meta_data": {
               "client_device_brand": "Unknown",
               "username": "Xiao",
               "client_version": "Mozilla/5.0 (Windows NT 10.0; Win64; x64) AppleWebKit/537.36 (KHTML, like Gecko) Chrome/87.0.4280.88 Safari/537.36 Edg/87.0.664.66"
           },
           "client_version": "Mozilla/5.0 (Windows NT 10.0; Win64; x64) AppleWebKit/537.36 (KHTML, like Gecko) Chrome/87.0.4280.88 Safari/537.36 Edg/87.0.664.66"
       }
     }
   }
Response - Verify Face
Response - Verify Face
   STATUS CODE 200
   {
       "livenessResult": true,
       "matchResult": true,
       "matchScore": 53.154655,
       "authStatus": 2,
       "faceLivenessResults": {
           "video": {
               "liveness_result": {
                   "decision": "LIVE",
                   "feedback": [],
                   "score_frr": 1.1757098732441127
               }
           }
       },
       "faceMatchResults": {
           "statusMessages": [],
           "verifyResult": true,
           "matchScore": 53.154655,
           "biometricMatchedCount": 1,
           "biometricsOnServer": "",
           "biometricMatchResultList": [
               {
                   "verifyResult": true,
                   "modality": "FACE",
                   "fmrScore": 53.154655,
                   "biometricMatchedCount": 1,
                   "biometricsOnServer": "Front",
                   "matchResultReference": null
               }
           ],
           "matchingMinutia": null
       }
   }
Authentication Using QR Code
To authenticate by inititating through a QR code scan we first have to take in the authenticate details like first name, last name, email address and phone number and make a call to generate the QR code from a secondary application. In our demo we use a web app for this process.
Generate QR Code
Web Portal

To start an authentication using the QR code method we must first generate the QR code to be consumed by the client application (in our example we use a web app). This web application uses a UI to allow an enduser to register using a username and email address. Then uses these pieces of information in the API Call for /triggerAuthenticate .
Base URL
www.awareid.aware-apis.com
Trigger Authenticate
We initiate an authenticate by calling the /triggerAuthenticate endpoint with our received access token
- username - required
- notifyOptions - optional
Trigger Authenticate
   POST baseUrl + /b2c/proxy/triggerAuthenticate
   Content-Type: 'application/json; charset=UTF-8',

   { "username": "[email protected]",
       "notifyOptions": {
           "notifyByPush": true
       }
   }
Response - Trigger Authenticate
   STATUS CODE 200
   {
       status : "SUCCESS"
       sessionCallbackURL : "https://awareid-dev.aware-apis.com/onboarding?data=jgTW40dmoG6Hp_d6Rg7YaZ97vfGSlV5BcBJvLvqXVmhoQ2Hg2DcC2Kvr9AkTZ38ZkyIfiSj80QFxOWs1YeckYsp3D0D9vS46wppl1Zdt-tpiAdzlvBKA2DBfcj7rf0VePWUn1vKdIPgEoWAulqRxZ_mNakFB7FijLg0QJ8kYsB6w0Nk1A4m9QtLGIdHcuGn9XJnxooQHyr2yhtUsgfOo2FrRXYmFIF7ZNwxYd56miFCs-yuD6eZZcvZ1M01Wje7ji0NYUWVpdes-DA_P0cKgsLPX5sV7SyPSlf9kmoCQz7Ag20kAKkOf-LFFKQmgnJ3362nXIEovxS8vp4BCClu7vIfEVCE2s1zS7zNwrDuRfFdViVAQMMxDMe77LnbKbfvLqUhiv--wPFyV9Iier1EDSL9y5kikOw_PGSyuRzvbQKuoNdGj-IqVZYZ_5QivOFqq_OEt8jaX1zZxAiQ8uXRt3g"
       qrcodeImage : "iVBORw0KGgoAAAANSUhEUgAAAZAAAAGQAQAAAACoxAthAAAGgklEQVR42u2ca4okOQyEDb6WwVc36FoGr+ILZ9NZO7Dsj2VtqB7orsrKKPArFAopp6x//VO+kC/kC/lCvpAv5Av5TyCzlNJnH62u2SNG6yvyVX6Sl0bjsm+6AJIX8npe7ZE3r8gXK6F9VL3Mr8n783vmDZCmC+u5a9QVo5Q6av7O6dCUzNb2TRdA8u3IQY8cas0VbDlojVzX9cG4CaJ95/ty4HlTy99TG3FUrWD8zNHpELZlnjH97Tn8XL0hXGcqqpY45h928omQHHL7x5+/McyREH400tyGYgctX8udqOGbMYbvXudDRGylRkKSH7Qtpw5c39vSZyuhERdAtClzsFUHzDfnpwpQOQ35VVOzom17AySv5P1FxygUUrvpW4zX4XPF3ipOPB+i0YrAQ9c7E5HT0YlDXkHofPyivmMheQMiIbm6+BZ9hY7cgO+CtS513gDRkuXeU2jN9ZIEym3JJDjo7snp63xIDldSJ4hLU8vJ+4xMmgztxgy32pgXQNBoCqqKO5uyQ2vpYKt5CVP7BZDKyCukoDGLvwffkfB87+zhNfxTIYvX3prSb1o2Dl2yuoUbarvVGyBKdgYxJ+dgo8R7HYqvlnbaqhdAvOG8WKG/UIcUtcQooUlf+pv5j4UgFnSMFFa1qkoVYs/Jzg9GKVdAEJz6hHkIohB5gdJRWQRBdBoXQCbiJiDrHUvRCYXY9HBFrBeNHwqx8MmRwnadwJoLmbwnqwBXpygu9Rsg+qTVvaDcKLkzGrtTGQKKtf9e/VMhJG0kPdgESnRimSRQ2Q67s88bIHWSOFfGzN8aayvrhZ+mtLv8ziyOhXhwRfQnqhNhB/qUuKQdSmrXb4BgZbCMOILDHhRJdsW8tdnxXv0zIUoJQpaglq0KSsaGOSiigMFHq1dAhFEaSlSqj0cg/YY0NXnUl91xLEScNm0SYN3s99XpqI5XtZ97PgTnRltS9IBOGDi1yOvRt59rUXc6ZNkWgPds4izyOaXV4j1kD07u+RDWr9s9G1BGs2iY+DVkCfg5N0A4UjsMicPF2+g5CMPhtY5yA4QiIP/w0UyDaDo7OtuRem/LQyFyaIbtJ0lRqwKN/ImoyndEhBdAyBMaJjPOxiC3FvdJ1HUoEc2wLoAEZQGJHukd3LNpce3kh5Rovko2B0MYqZZQqgH7dtQ9K6hrMciHnX4ohNRteC9WzGfVN2yDSDfYWmtXQMQRBJxJwjasPJ2+UU1zx0PcAJGCI7BWCmfiCZ8vveASgbZeALFJw9rpmElnUyeEN6oz6vqWo8dCsJwG5Wfqm5Rpm7dlUIdyNveqWB0L0ZmqHDSUT8TjGljWyQBpH8M/FELwkfZ0QCo2PnClFulbNY3XCyDk1U0OVOHD5Son5pQyOmaDLzofgsLBUqPVROy3XTWXnC0jPuyOUyF17NO1iY7Os8CRGs2OzofsORhCprkpgdSnWAPtuvNjU/XzIShni9GwUCNp++kSqpsZ+7oAglIY5DxUO5EJ9ekKEvWFCx0XQBRN6fwThY9d5FzhSfBm7bEugRBFN5haLcna8AZ1Z217l9JOhZCiifpg6uEyusuC5J8D1/Dd3XEqhJasSc+sKxs0AcvtoFnTDDLeztWxEDKCnVZTbhoUcNyHojf0a7UrIBFuMGueAla1EaGQccUL+dHZdShktMfUeEIrGpU2mt1G67aUCyC7BCWCQ65Vmwbbx227iWOUGyB2biaKFNtz9/6Q1E3rnYccD4dM5wfTq4iBC6zY6Vxu1yjvtPpQyB6bqhr8fbqbGs4B1bSn2fF8yCTntOdB2jYwA5FtaFQqn7/b5o+FoKG9jLRn6qO5S2jByOWvv1rOzoXQuYSXyWGi6TR4eIYsruzU+v1oxqEQBRwCD0n1CofSsHmwN2282ufOhTSiZ8GypUFLXu3urNk1gpj9N40fCyG3EWMPn7MqU8rPMvipoHgI8gKIVQHKE6vWCmhi57g9c1oRXQAZPl1UzG2o+7GZgjtFsPp5ivF0yH76h+fM+l476gMkbc2tW/PzUaYjIXMXMM3XcLrO2DCNuz/7p8J5OqS7sKlsYbo7q6MbKKDblf5DmeNMSMOe5WCR7CgxYMDUnx576qPl7GRIoW1GeVxzY7Yrt8VZT3meZrgEMvw8FmYhxqcfNCVguXvrAshu8e8PBXITzzPZfn5agm6AiC6oyrrdLObz3CK19e6H/+qKCyDf/73hC/lCvpAv5Av5Qv5nyF+w76Y2yWY7wwAAAABJRU5ErkJggg=="
       sessionToken : "aa73e547-0f1b-4235-a7b0-dd52fa4ab774"
       errorSummary : null
   }
Our response for trigger authenticate includes five pieces of information with the most relevant piece being the base64 encoded string of the QR that is used to be displayed to the user to continue the authentication on their device.
With our QR code generated in our web application we then have to proceed with scanning the QR code and completing the authentication. The authentication workflow involves 4 steps:
- Scan QR code and decrypt data.
- Initiate authentication
- Verify device
- Verify face
The QR Code will return a url with an encrypted data parameter named “data”.
This data has to be decrypted using the available public key. Once decoded 3 pieces of information are provided separated by “&”.
- Host url
- This URL is where all subsequent api calls will be made through
- The API Key
- This API Key is used in the header of api calls
- The key value pair in the header is as follows:
“apikey”:API_Key
- Session Token
- The session token is used to validate the session.
Authentication Using QR Code Step 1 - Validate Session Token
The first api call necessary to authenticate a user is /tokenVerify/validateSession.
Validate Session
   POST /tokenVerify/validateSession
   "Content-Type": 'application/json; charset=UTF-8',
   "apikey": apiKey

   {
       "sessionToken":sessionToken
   }
Urlencoded
This is the only call whose content type of this call is “application/x-www-form-urlencoded”
Response - Validate Session Token
Response - Validate Session Token
   {
       "accessToken": "accessToken",
       "methodType": "authenticate",
       "customerName": "customerName",
       "customerLogo": "",
       "userName": "customerUsername",
       "email": "customerEmail"
   }
Authentication Using QR CodeStep 2 - Initiate Authentication
Initiate Authentication
   POST /authenticate
   Authorization: 'Bearer AccessToken'
   apikey: 'apikey'

   {
       "registrationCode": "registrationToken",
       "deviceId": "deviceID"
   }
Response - Initiate Authentication
Response - Initiate Authentication
   STATUS CODE 200
   {
       "authToken": "b8bf6f22-6f93-4bcb-a5b6-871b689c6750",
       "requiredChecks": [
           "verifyDevice",
           "verifyFace"
       ]
   }
Authentication Using QR Code Step 3 - Verify Device
Verify Device
   POST /verifyDevice
   Authorization: 'Bearer AccessToken'
   apikey: 'apikey'

   {
       "authToken": "authToken",
       "signature": "signature",
       "deviceId": "deviceID"
   }
Response - Verify Device
   STATUS CODE 200
   {
       "message": "Device verified.",
       "authStatus": 1
   }
Authentication Using QR Code Step 4 - Verify Face
Verify Face
   POST /verifyFace
   {
       "authToken": "{{atoken}}",
       "faceLivenessData":
          {
            "video": {
           "workflow_data": {
               "workflow": "hotel2",
               "rotation": 0,
               "frames": [
                   {
                       "data": "",
                       "data": "",
                       "data": "",
                       "tags": [],
                       "timestamp": 1609002526076.1338
                   }
               ]
           },
           "meta_data": {
               "client_device_brand": "Unknown",
               "username": "Xiao",
               "client_version": "Mozilla/5.0 (Windows NT 10.0; Win64; x64) AppleWebKit/537.36 (KHTML, like Gecko) Chrome/87.0.4280.88 Safari/537.36 Edg/87.0.664.66"
           },
           "client_version": "Mozilla/5.0 (Windows NT 10.0; Win64; x64) AppleWebKit/537.36 (KHTML, like Gecko) Chrome/87.0.4280.88 Safari/537.36 Edg/87.0.664.66"
       }
     }
   }
Response - Verify Face
Response - Verify Face
   STATUS CODE 200
   {
       "livenessResult": true,
       "matchResult": true,
       "matchScore": 53.154655,
       "authStatus": 2,
       "faceLivenessResults": {
           "video": {
               "liveness_result": {
                   "decision": "LIVE",
                   "feedback": [],
                   "score_frr": 1.1757098732441127
               }
           }
       },
       "faceMatchResults": {
           "statusMessages": [],
           "verifyResult": true,
           "matchScore": 53.154655,
           "biometricMatchedCount": 1,
           "biometricsOnServer": "",
           "biometricMatchResultList": [
               {
                   "verifyResult": true,
                   "modality": "FACE",
                   "fmrScore": 53.154655,
                   "biometricMatchedCount": 1,
                   "biometricsOnServer": "Front",
                   "matchResultReference": null
               }
           ],
           "matchingMinutia": null
       }
   }
Software Acknowledgments
Aware FaceCaptureAwareId libraries incorporate third-party software. See the LICENSE file installed with the FaceCaptureAwareId software for the full license agreement.